Building A Mobile Application With O4W - Part 3
A Quick Review
Over the last two issues, I discussed Revelation Software's O4W web development toolkit, and how it has evolved since its introduction to support mobile devices. O4W Mobile is built upon jQuery Mobile, an open source community supported framework, to provide a device independent user interface that's appropriate for the "mobile computing environment" (with all the differences that entails from the traditional "desktop computing environment").
In Part 1, I demonstrated how you could build a simple display form using the O4W APIs; in Part 2, we took that same routine and enhanced it to provide more interactivity, user input, and advanced interface elements. In our concluding Part 3, we'll show how you can process the entered user data.
Where We Left Off…
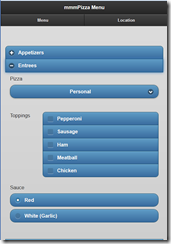
The form we ended up with displayed an interactive menu of items we could order at the imaginary Rev Pizza Parlor (fig. 1).
Fig. 1
Send In The Data
Our form is now fully interactive, but until we provide a button for the user to click when they want to submit their order, we won't know what they've chosen.
We can use the O4WButton API call to display a button at the bottom of the menu:
O4WButton("Submit Order", "BTN_SUBMIT",O4WMarkedOptions('1'))
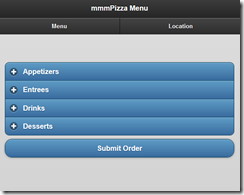
This creates a button with the label "Submit Order", with the unique ID of "BTN_SUBMIT", and marks it as being the default button (which isn't really needed here, since there's just the one button on the form, but is still good practice) (fig. 2). This button can now be clicked to the user's heart's content…but we still won't get their order details until we tell O4W we want to be notified about the button press.
Fig. 2
The O4WQualifyEvent API call lets us associate events with elements and controls. There are many different events that can be passed in to O4WQualifyEvent, but the one we care about in this instance is the "click" event:
O4WQualifyEvent("BTN_SUBMIT", "CLICK")
Now, when the user presses the "Submit Order" button, a "click" event will be sent into our Basic program; we'll have to add some code to properly handle this event. In particular, we'll want to read in all the values from the form, save (or process) these in some way, and provide a response to the user so they know their submission was successful.
Obviously, the actual creation of the pizza is beyond the scope of this article, but we can provide an example of what might be done in the click handler (fig. 3).
Fig. 3
Whenever your routine responds to an event, you must first call O4WResponse() to properly set up the O4W environment. This corresponds to calling O4WForm() when creating the form in the "create" event.
We can then use the O4WGetValue function to retrieve the values that were set in the form. Note that we use the "variable names" of the input elements (and not the "unique IDs") when requesting the variable values.
Finally, we will create a dialog box that provides an acknowledgement to the customer. One of the quirks of O4W (and the underlying jQuery) is that, when we want to respond to an event, we don't usually create new sections and pages; we just change the content of previously-defined sections.
Let's go back to the end of the create event, then, and define a "placeholder" section for our dialog (fig. 4).
Fig. 4
We can now replace that "placeholder" section with the real dialog we want to display (fig. 5).
Fig. 5
We learned in Part 1 that each "page" of mobile output has sections that each play a well-define role — the "page" role, the "header" role, the "content" role — and when we want to display a dialog, we must create a section that is identified as being in the "dialog" role:
dialogOptions = o4wmobileoptions("dialog","b")
We pass this style/option value in the O4WSectionStart API call, and then define the rest of the dialog (the header section and the content section). Note that the O4WSectionStart also includes the O4WResponseOptions() option parameter; this tells O4W that this section is replacing a section that was previously defined.
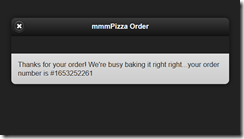
With the dialog page defined, we instruct O4W to display the dialog with the O4WDialog call (fig. 6).
Fig. 6
The user has the satisfaction of knowing that some hot, gooey goodness will soon be coming their way, and the O4W developer has the satisfaction of knowing that developing mobile forms is now as easy as…pizza pie.


